Tampilkan postingan dengan label effect. Tampilkan semua postingan

making street wall Graffiti effect

This is one of cool effect in this photoshop tutorial....about making graffiti in street wall..this tutorial is very simple...and easy to do...although for beginner designer...let's try it...


1. you should have this street wall picture..or you can try to find it in google..

2. then add your image..i use my own picture like this..

3. make a skew position like this...

4. then got to blending mode layer..change to overlay..

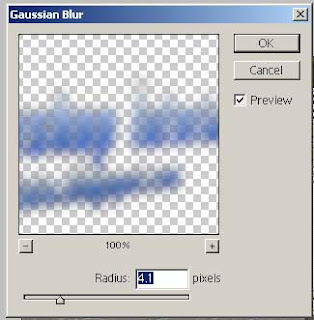
5. duplicate the layer..and add gaussian blur filter...
graffiti

6. finish...simple...isn't it??

Dragon Ball Effect

in the previous cool photoshop tutorial we have a kamehameha (dragon ball 2009) effect, now let's try to make the ball of yellow dragon ball...this is one of amazing tutorial i ever made....lets try...
1. open your hand image...
2. make a new layer (Shift+Ctrl+N), then make a circle (ball) selection using this tool


3. then fill that selection using filter>render>clouds (the default color is black and white)


4. then go to filter>liquify, and make distort arround the ball
5. change the blend mode to hard light


6. duplicate that layer, 4 times...by pressing Ctrl+J


7. in the one of these layer, add outer glow with yellow color for outer effect, and use hue/saturation (colorized) to change the ball color


8. in the active layer, add the stars using brush tool
9. and you finished this tutorial...simple, isn't it? (^_^)

adding image on shirt

t-shirt effect
this cool photoshop tutorial try to show you how to add image on your shirt, if you understand how to make realistic flag before, i'm sure that you can do this effect...this tutorial simple and easy to do...let's try it...
1. first, open your shirt object
2. then add the image on your shirt like this
3. use brush tool to make shadow effect, and don't forget to change the color similar with shirt color
4. make your shadow like this
5. then add gaussian blur with this range
6. change the opacity to 60%
7. finish!!!simple, isn't it??

Kamehameha (dragon ball 2009) effect

Dragon Ball (2009), one of my favorite film that i'm waiting for....first time i see the trailer...hhmm... i like it, lot of special effect shows there...and the favorite effect is Kamehameha..in this photoshop tutorial, i try to make a kamehameha energy effect....this is very cool photo retouch tutorial guys...lets do it!
1. open your photo object
2. make new layer, and add brush like this
3. then add gaussian blur to your brush
4. for the kamehameha energy , add layer effect with outer glow with this color code

5. then duplicate the energy layer (Ctrl + J), and make it bigger than before


6. next, change the layer blend mode to overlay...
7. and now, you have a kamehameha picture...!!

Glassy 3d Button (Circle)

3d glassy button
in the previous post (about The 3d mirror effect), we have learn about how to make a 3d mirror effect, now, this photoshop tutorial will share to you about how to make glassy 3d button (Circle) ...this cool tutorial is very important for you as web designer, because it will make your website more cool and fantastic looks...so, let's start guys...!

1. make new document with black color as the background
2. make new layer, then add the layer with new circle object (you can use elliptical marquee tool) then fill that selection with black too
3. then add layer effect with outer glow, choose white as the glow color
4. then make new circle selection, smaller than before, fill with gradient color (black-white)
5. delete half of that gradient image (feather 15px) to make glassy effect, if you want it bigger, you can skew that...
6. then make the new circle selection under the smaller glassy circle, fill with white brush...
7. you can make other color with colorize that button....and for the best result, you can add mirror effect too...(if you forget about mirror effect, you can go to :2d mirror effect)3d glassy button
8. finish...!!!

photoshop tutorial:3d Mirror effect

3d mirror effectthis is one of photoshop tutorial in cool effect that very interesting...make mirror on your object..sometimes we very confused to make 3D mirror effect (for 2d, you can go to 2d mirror effect here ) in this tutorial, we try to make nice mirror effect..with box as the object..let's start...

1. open your image

2. duplicate the image layer and flip vertically
3. put the image copy under the original image...you have to put it exactly
4. with rectangle tool, make a selection like this..
5. then skew the object...

6. repeat step 4 and 5 to other selection..
7. now you delete half of the image with rectangle tool and don't forget to change the feather like this...
8. after that, change the blend layer mode down to 15%
9. finish!!!3d mirror effect